Recipe of making Anpan: Japan’s Classic Sweet Snack Bread
Recipe of making Anpan: Japan’s Classic Sweet Snack Bread
Recipe of making Anpan: Japan’s Classic Sweet Snack Bread
Of course! Here is a detailed recipe for making Anpan, Japan's beloved sweet red bean bread.
Anpan (あんパン): Japan's Classic Sweet Red Bean Bread
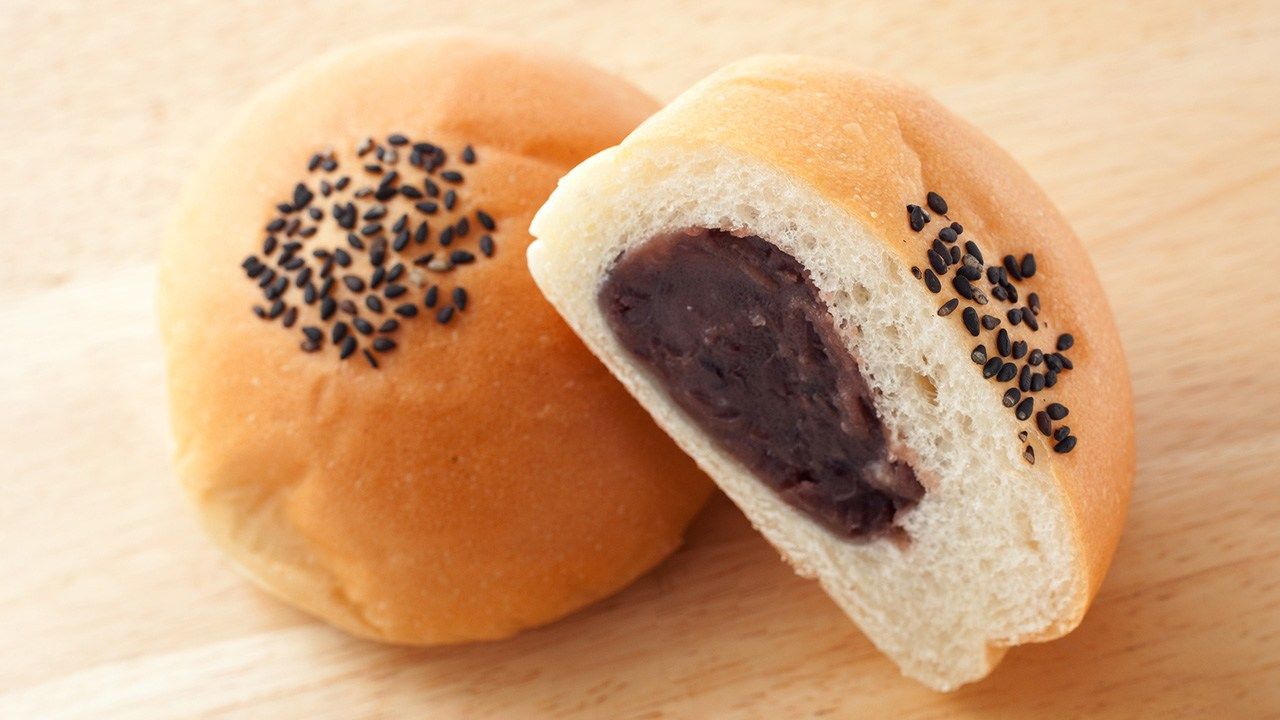
Anpan is a soft, slightly sweet, milky bread bun filled with a sweet red bean paste called anko. It was first created in 1874 by a baker in Tokyo and quickly became a national sensation. The soft, pillowy bread paired with the sweet, earthy filling is a perfect match.
This recipe breaks down the process into manageable steps, from making the tangzhong (a cooked flour paste that guarantees a super soft and fluffy texture) to shaping and baking the buns.
Yield: 8 medium-sized buns
Prep Time: 45 minutes (+ 1.5 - 2 hours for proofing)
Cook Time: 15 minutes
Ingredients
For the Tangzhong (Flour Roux)
3 tablespoons (25g) bread flour
1/2 cup (120ml) water
2 tablespoons (30ml) whole milk
For the Bread Dough
2 1/2 cups (320g) bread flour
1/4 cup (50g) granulated sugar
1 teaspoon (5g) salt
1 tablespoon (10g) instant dry yeast (or 1 packet)
1/2 cup (120ml) whole milk, warm (about 110°F/43°C)
1 large egg, at room temperature
3 tablespoons (45g) unsalted butter, softened at room temperature
All of the tangzhong (from above)
For the Filling & Topping
1 1/2 cups (about 400g) sweet red bean paste (anko)
(Tsubuan - chunky paste - or Koshian - smooth paste, based on your preference)
1 egg, beaten (for egg wash)
Black or white sesame seeds for garnish (optional)
Equipment
Stand mixer with a dough hook (highly recommended, but you can knead by hand)
Baking sheet
Parchment paper
Kitchen scale (for accuracy, but measuring cups work too)
Instructions
Step 1: Make the Tangzhong
In a small saucepan, whisk together the bread flour, water, and milk until no lumps remain.
Place the saucepan over medium-low heat and cook, stirring constantly with a spatula or whisk, until the mixture thickens into a smooth paste and lines become visible as you stir (about 3-5 minutes).
Immediately transfer the tangzhong to a clean bowl and cover it with plastic wrap, pressing it directly onto the surface to prevent a skin from forming. Let it cool to room temperature.
Step 2: Make the Dough
Combine Wet Ingredients: In the bowl of your stand mixer, combine the warm milk, yeast, and a pinch of the sugar. Let it sit for 5-10 minutes until it becomes foamy (this "proofs" the yeast).
Mix Dough: Add the cooled tangzhong, egg, bread flour, the remaining sugar, and salt. Mix on low speed with the dough hook until a shaggy dough forms.
Knead: Increase the speed to medium and knead for about 5 minutes until the dough is smooth and begins to pull away from the sides of the bowl.
Add Butter: With the mixer running, add the softened butter one tablespoon at a time, making sure each piece is fully incorporated before adding the next. This might take a few minutes.
Knead Until Smooth: Continue to knead for another 8-10 minutes on medium speed until the dough is very smooth, elastic, and slightly tacky but not sticky. It should pass the "windowpane test": take a small piece of dough and gently stretch it. If you can stretch it thin enough to see light through it without it tearing, it's ready.
First Proof: Form the dough into a ball. Place it in a lightly oiled bowl, turn it over to coat, and cover the bowl with plastic wrap or a damp cloth. Let it rise in a warm, draft-free place for 60-90 minutes, or until doubled in size.
Step 3: Prepare the Filling & Shape the Buns
Divide: While the dough is proofing, divide your red bean paste into 8 equal portions (about 50g each). Roll them into balls and set them on a plate.
Punch Down & Portion: Once the dough has doubled, gently punch it down to release the air. Turn it out onto a lightly floured surface and divide it into 8 equal pieces.
Shape Dough Balls: Form each piece into a smooth ball by pulling the edges down and pinching them together at the bottom. Cover them with a damp cloth and let them rest for 15 minutes. This relaxes the gluten and makes them easier to shape.
Fill the Buns:
Take one dough ball and flatten it into a disc about 4-5 inches in diameter. The edges should be thinner than the center.
Place one ball of red bean paste in the center.
Gather the edges of the dough up and over the filling, pinching them firmly together at the top to seal completely. Make sure there are no gaps or holes, or the filling will leak during baking.
Place the bun seam-side down on a baking sheet lined with parchment paper. Repeat with the remaining dough and filling, spacing the buns a few inches apart on the baking sheet.
Step 4: Second Proof
Cover the shaped buns loosely with plastic wrap or a damp cloth.
Let them rise again in a warm place for 45-60 minutes, or until they are puffy and nearly doubled in size. They should spring back slowly when gently poked.
Step 5: Bake
Preheat your oven to 350°F (180°C).
Gently brush the top of each bun with the beaten egg wash. This will give them a beautiful golden shine.
If desired, sprinkle a few sesame seeds on top of each bun.
Bake for 15-18 minutes, or until the tops are a deep golden brown.
Immediately transfer the buns from the baking sheet to a wire rack to cool completely. This prevents the bottoms from getting soggy.
Tips for Success
Don't Skip the Tangzhong: This is the secret to incredibly soft, fluffy, and stay-fresh-longer bread.
Yeast Temperature: Ensure your milk is warm, not hot. Hot liquid will kill the yeast.
Proper Sealing: This is crucial! Any tiny hole will allow the sweet bean paste to ooze out during baking.
Don't Overbake: Keep a close eye on them. They bake quickly, and overbaking will dry them out.
Storage: Store cooled anpan in an airtight container at room temperature for up to 2 days. For longer storage, freeze them in a sealed bag for up to a month. Thaw at room temperature.
Enjoy your homemade taste of Japan! 🍞❤️
Comments
Post a Comment